Monitor Your Homelab from the Cloud: Uptime Kuma on a VPS using Linode + Tailscale + pfsense

I really love monitoring my homelab with Uptime Kuma.
But, the worrier in me has started to wonder "what would happen if the server I have Uptime Kuma running on died?" I would have no way of knowing the status of it, or of any of my services!
Can you imagine?
So, I sought out to solve this problem, and this blog will explain how you can do the same. There are a few ways of achieving this, probably other better ones, I understand. But I'll be showing you the one I came up with. My criteria for this project are as follows:
- Monitor the uptime of my homelab on something that is not my hardware.
- Spend as little money as possible.
- Use cool tech.
- Keep my homelab safe.
To check off #1 and #2, I chose to utilize the cheapest tier of VPS from Linode which is $5/month (I'm not sponsored by Linode - but I'd like to be).
Assumptions
I'm assuming a few things about you, and your homelab if you're following along here. First, that you can generally get around Linux, Docker, and the like. If so, you should be fine because I barely can. Next, that you have pfsense (or some other firewall/router that can run Tailscale and expose routes). Lastly, that you can set up a Linode account, and spare $5 a month.
^that's one coffee.... figure it out
Disclaimer
Set up a Linode account
Okay after all that preamble, let's jump in.
I'm setting up my itty bitty server in Chicago since I'm in the Midwest, and installing Ubuntu on it since that's what I prefer - you can pick any region or Linux distro you want, be aware that could impact the effectiveness of these instructions.
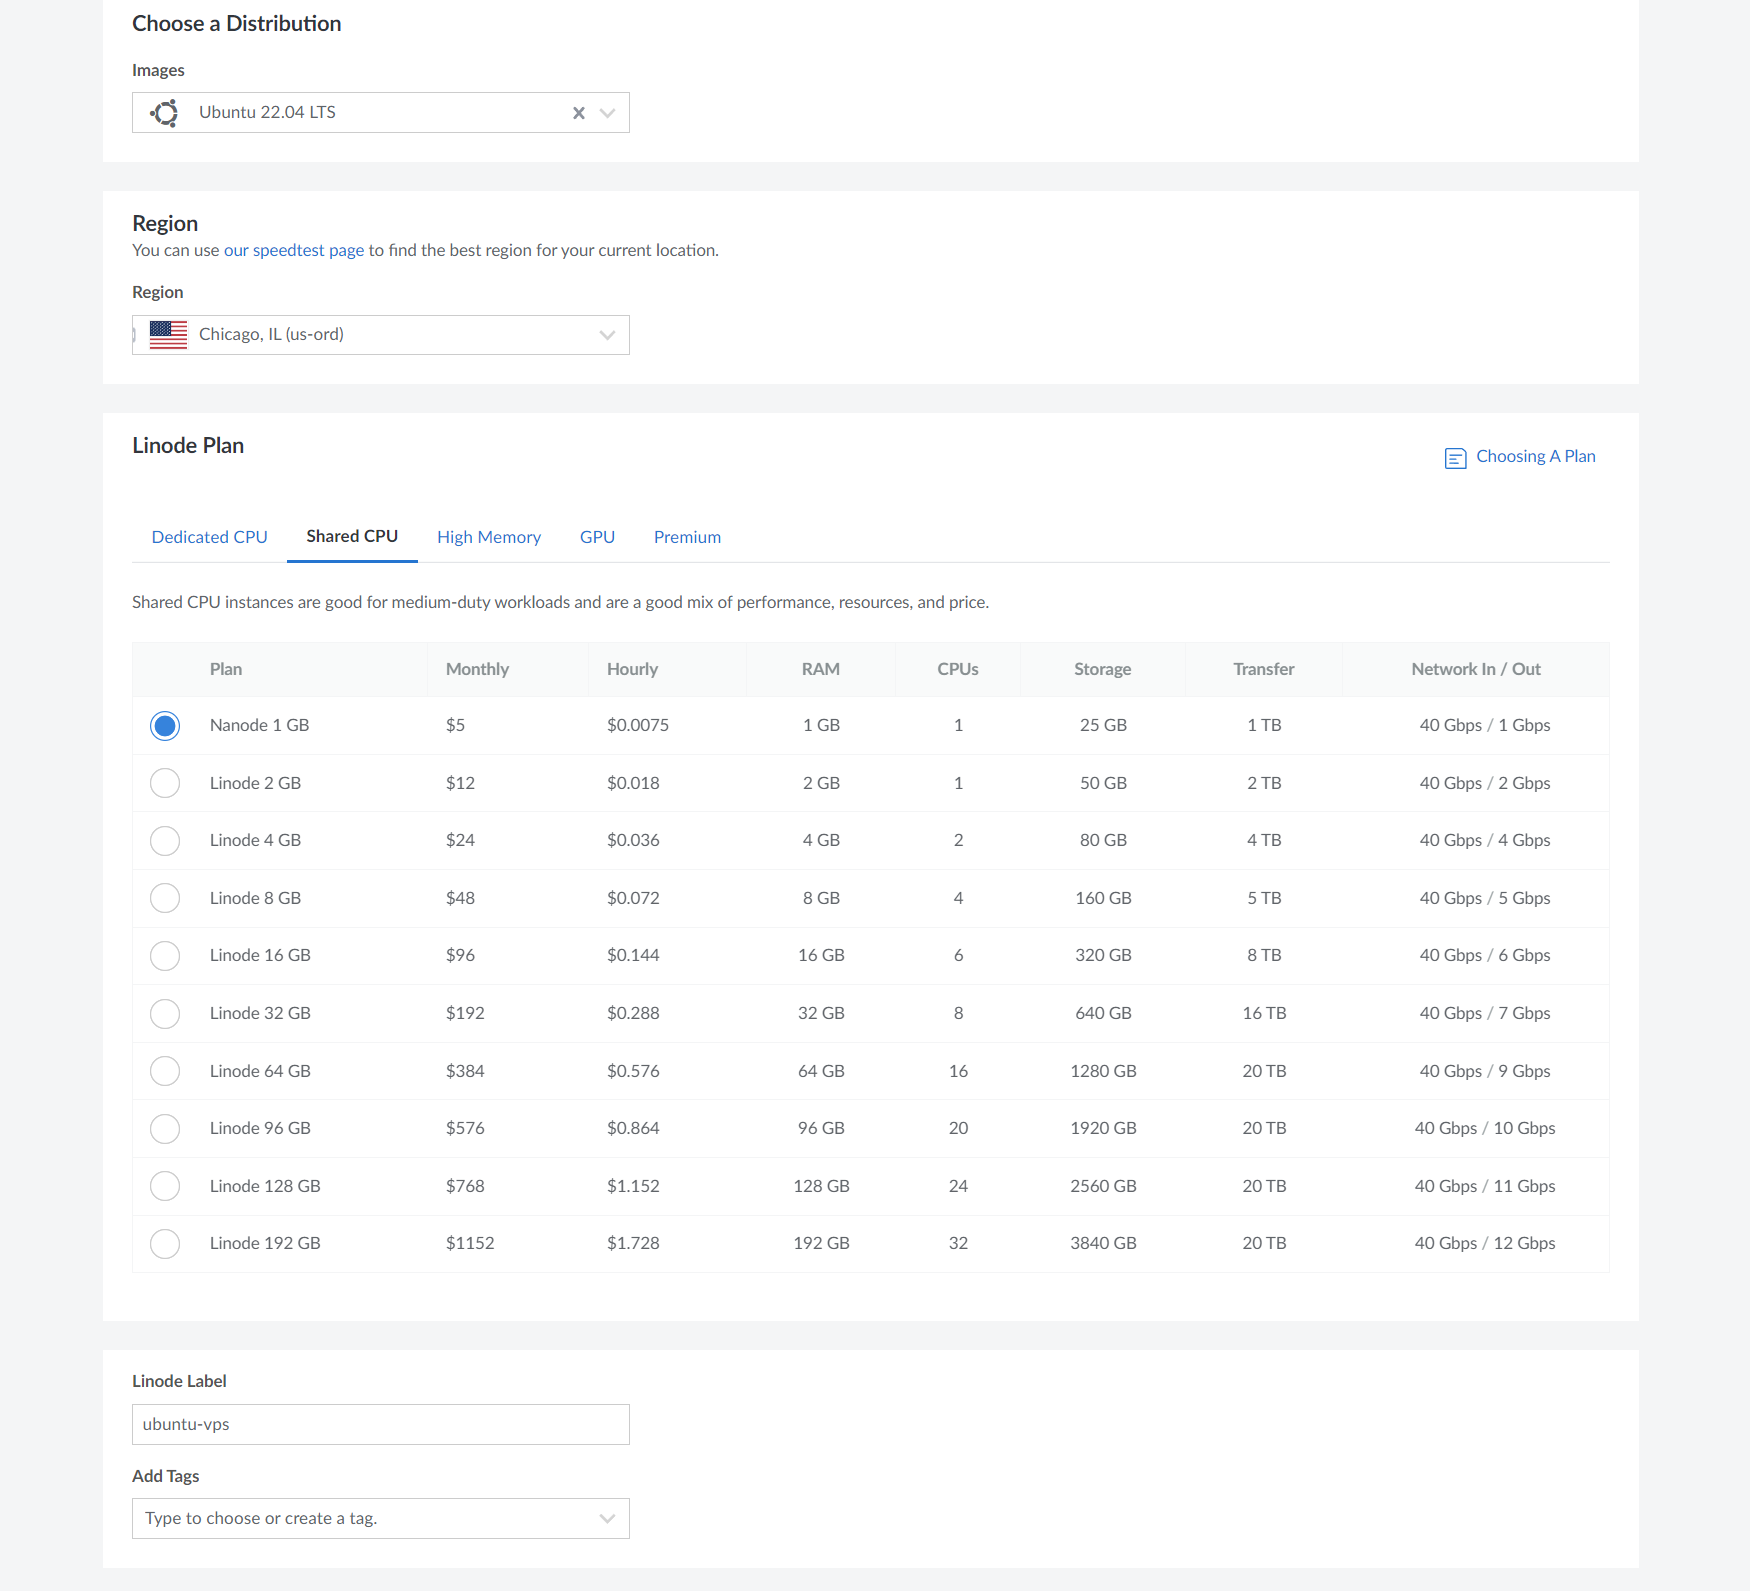
Once the box has been created, I recommend you create an SSH key to add a layer of security and remove the annoyance of authenticating every time you SSH in. Once complete, we're ready to start installing stuff.
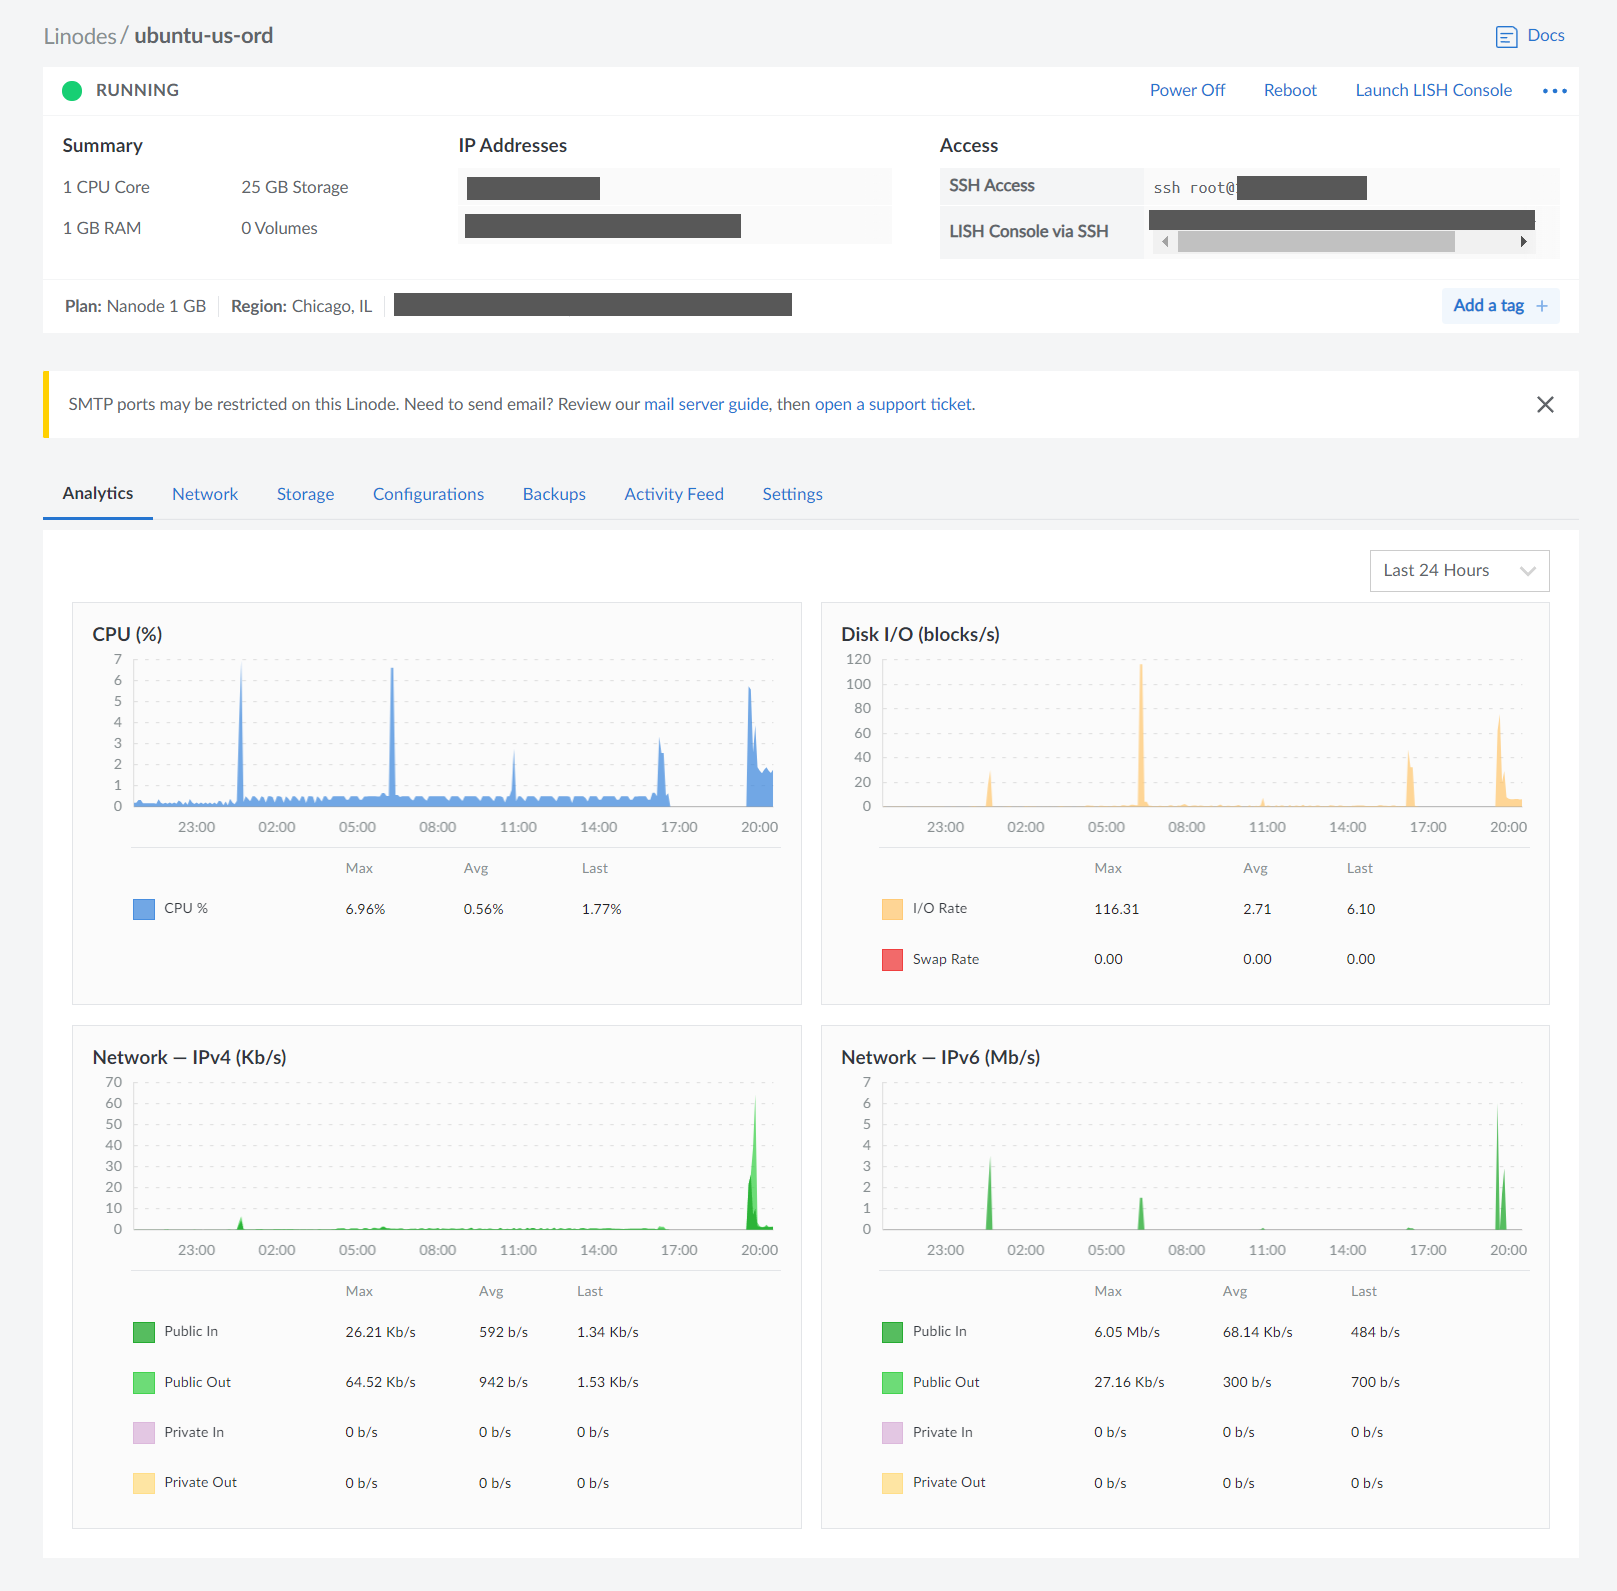
I've redacted some info, but you'll be presented with this page once it completes provisioning the server. And frankly, this is really cool. The fact that you now have a dashboard for the cloud-hosted VPS that built to your specs in under a minute is wild.
Using the command below and the root password you set up, to connect to your box.
ssh root@ipaddressInstall Tailscale on pfsense
There is a simple process outlined in the below link on how to install Tailscale on pfsense. Take note, for this process you will need to setup Tailscale as an exit node, which turns Tailscale into a Full-Tunnel VPN. You'll also need to make sure to follow the instructions on adding your local subnet as an "advertised route".
I ran into an issue initially because my appliance was out of date, just something to note.
 WunderTech
Once complete, do the following:
- Ensure your router shows up in your Tailscale account as connected.
2. Under the three dots next to your router -> "Edit Route Settings" you'll need to turn on both options.
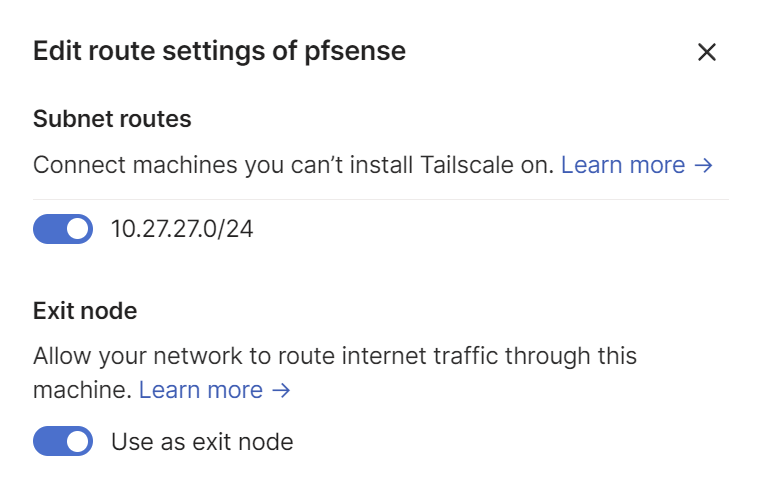
If that is all true and good, you're ready to move on.
Install Docker, Tailscale, and Uptime Kuma on Ubuntu
There's frankly lots of work you can do to secure this Linux box to the outside world, I'm not going to get into it in this post - but I highly recommend you do some research on how to lock it down since it will be public facing.
We'll be using Docker Compose, but you can do whatever you want with your life.
Docker
Using this guide on the Docker site, set up the Docker repo. Then, go ahead and install Docker Engine, containerd, and Docker Compose.
sudo apt-get install docker-ce docker-ce-cli containerd.io docker-buildx-plugin docker-compose-pluginConfirm Docker is indeed working.
sudo docker run hello-worldTailscale
Great, now we have an Ubuntu server running on a Linode that is running Docker. But, how are we going to get this server to see our home network? As of right now it's just a box floating out there in the void of the Internet, we can change that with Tailscale! The great thing about Tailscale is it's based on Wireguard and requires no port forwarding on your router.

So let's install Tailscale on the Linux box. I'm taking these directions right from the official Tailscale site below.

curl -fsSL https://pkgs.tailscale.com/stable/ubuntu/jammy.noarmor.gpg | sudo tee /usr/share/keyrings/tailscale-archive-keyring.gpg >/dev/nullcurl -fsSL https://pkgs.tailscale.com/stable/ubuntu/jammy.tailscale-keyring.list | sudo tee /etc/apt/sources.list.d/tailscale.listsudo apt-get update
sudo apt-get install tailscalesudo tailscale upThis will prompt you with a link, and you'll need to click it and authenticate your new Tailscale node into your account.
Next, do the following command to make sure your Linux box sees your Tailnet.
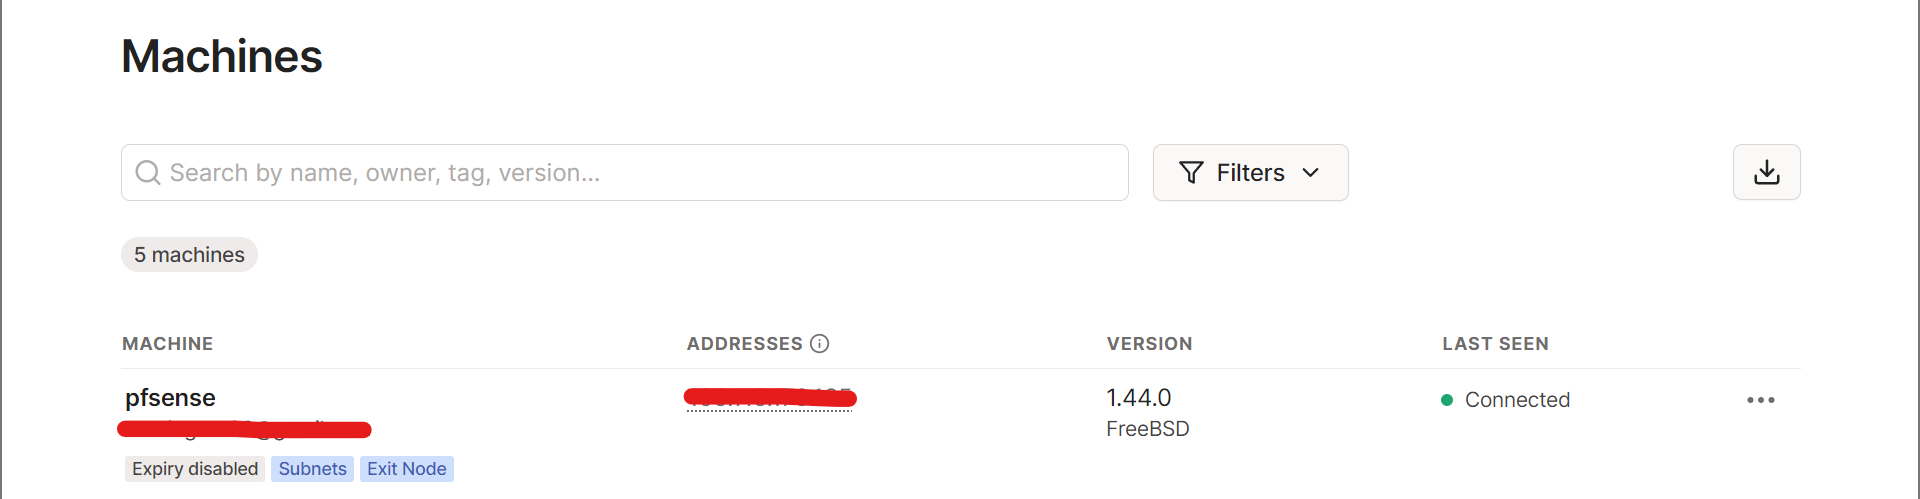
tailscale statusYou should see your pfsense box (and any other devices on your Tailnet), and next to it you should see that it's offering routes + is an exit node.
For example in the photo below, the red is the names of my Tailscale devices, blue is the OS/IP of those machines, and the orange is the public IP of my router.

You could also check the admin console of Tailscale to confirm the VPS is represented there as well.

Well, it's looking pretty good. Next, let's ping something on our local network to see if our Linode box can actually see it.
ping IPADDRESSIf you get a response, like me, that's a good thing.
Uptime Kuma
Let's install Uptime Kuma now. I'm taking these instructions right from the Github page here https://github.com/louislam/uptime-kuma/wiki/🔧-How-to-Install which I'd recommend you read, since there are tons of ways to install this. I'll be doing it the simple way, with via CLI.
curl -Lo kuma_install.sh https://git.kuma.pet/install.sh && sudo bash kuma_install.shAfter running through the simple CLI commands our Uptime Kuma instance is accessible through
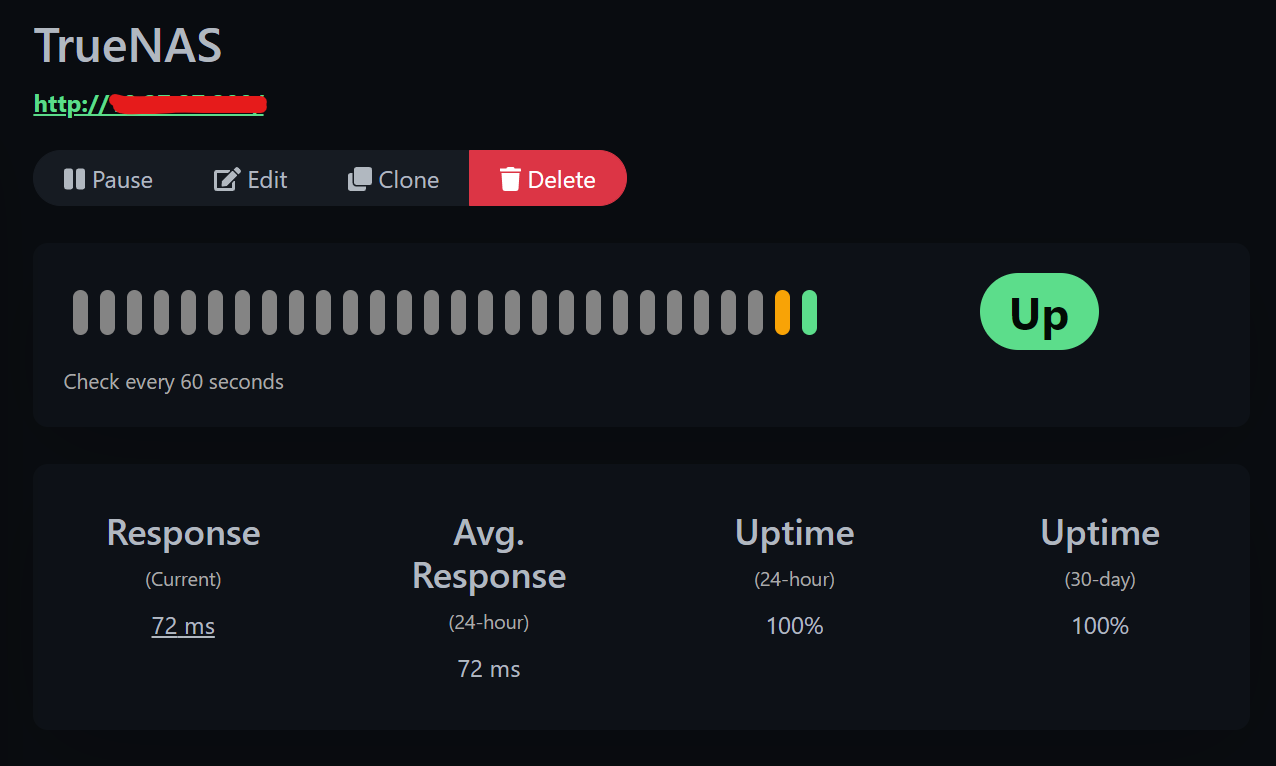
IP_OF_VPS:3001Now, go to your Uptime Kuma instance and try adding a new monitor for a local device. Below I added my TrueNAS server with it's local IP - Uptime Kuma says it's up.
I tried one last thing to really be sure the connection over Tailscale is working right. Once I let the above monitor run for a bit I killed Tailscale on my VPS with the command below:
tailscale downInstantly Uptime Kuma showed this device as down! Task failed successfully?
The only thing left to do is to set up Uptime Kuma's notifications for when a device goes down. I'll let you run with that on your own.
Probably one of the easiest ways to cut this guide a little bit short would be to just set up this Linode instance of Uptime Kuma we're about to set up to monitor another instance of Uptime Kuma on your local network... that way if your local one goes down you'll be notified. You're totally welcome to do it that way, or you can monitor your whole homelab from the cloud.
Thanks for reading.