How I Host This Blog (Self-hosting Ghost Using DigitalOcean)

If you're anything like me, you love simply structured, beautiful, easy to consume content. This is why I love Markdown (and my fav editor, Typora) and Apple marketing.
This has felt like the main barrier for me starting a blog since I never felt like the heavy-hitters in the blog space, like Wordpress, really had the look I was going for. They were too busy, too unpolished, too complicated. I felt like it took away from the writing.
Then, I found Ghost.
Ghost is about a lot more than just blogging, and it's designed for the current landscape of content writers, creators, and consumers. You can pay them a small fee per month to use a Ghost-hosted (Ghosted, if you will) blog, or you can host it yourself for free.** All of their branding content is very thoughtful, the designs are clean, the editor is world-class, plus they have a really excellent community of creators.
I'm not sponsored by Ghost but I love them, truly. Please for the love of God Ghost, sponsor me, I'm begging you.
**Obviously it's not free, but Ghost doesn't charge you if you self-host. You'll still have to pay one way or another for the resources to run the blog, whether on your hardware or not.
Background
I understand there are plenty of tutorials showing how to do this, but I wanted to detail how I host my blog, in case you're interested.
Now, self-hosting isn't for everyone, and if you read this article and think "nah", no shame. I still recommend Ghost.
Don't be scared, we aren't really self-hosting like the people at r/selfhosted are. We won't be hosting this on our own physical hardware. We're going to be using a DigitalOcean droplet to house our shiny blog. Also, I'm assuming that if you're reading this you're at least interested in the world of tech, servers, and blinking lights. If you have an interest + any experience at all, I think you can make it through this.
Ghost has a simple tutorial if you'd like to just install Ghost on Ubuntu yourself, to play with (or run it in production) https://ghost.org/docs/install/ubuntu/. But, there are inherent risks with hosting a website intended for public consumption on your local setup. That's why we'll be doing this a different way.
Why DigitalOcean?
In previous projects I've use Linode for my VPS, which I really enjoy. But I don't discriminate when it comes to hosting providers. In fact, the reason why I'm using a different provider is bigger than my normal "idk cuz I feel like it". DigitalOcean's apps marketplace has a Ghost one-click option, which makes the setup of this wonderful blog platform very simple.
So first, create a DigitalOcean account if you don't have one already. You'll then be asked to create your first project. Don't over think it, just call it something related to Ghost.
Next, we need to create a droplet. Also known as a VPS (Virtual Private Server). Basically, a little VM that DigitalOcean hosts for us, installs our OS of choice on, and gives us the access to make changes to.
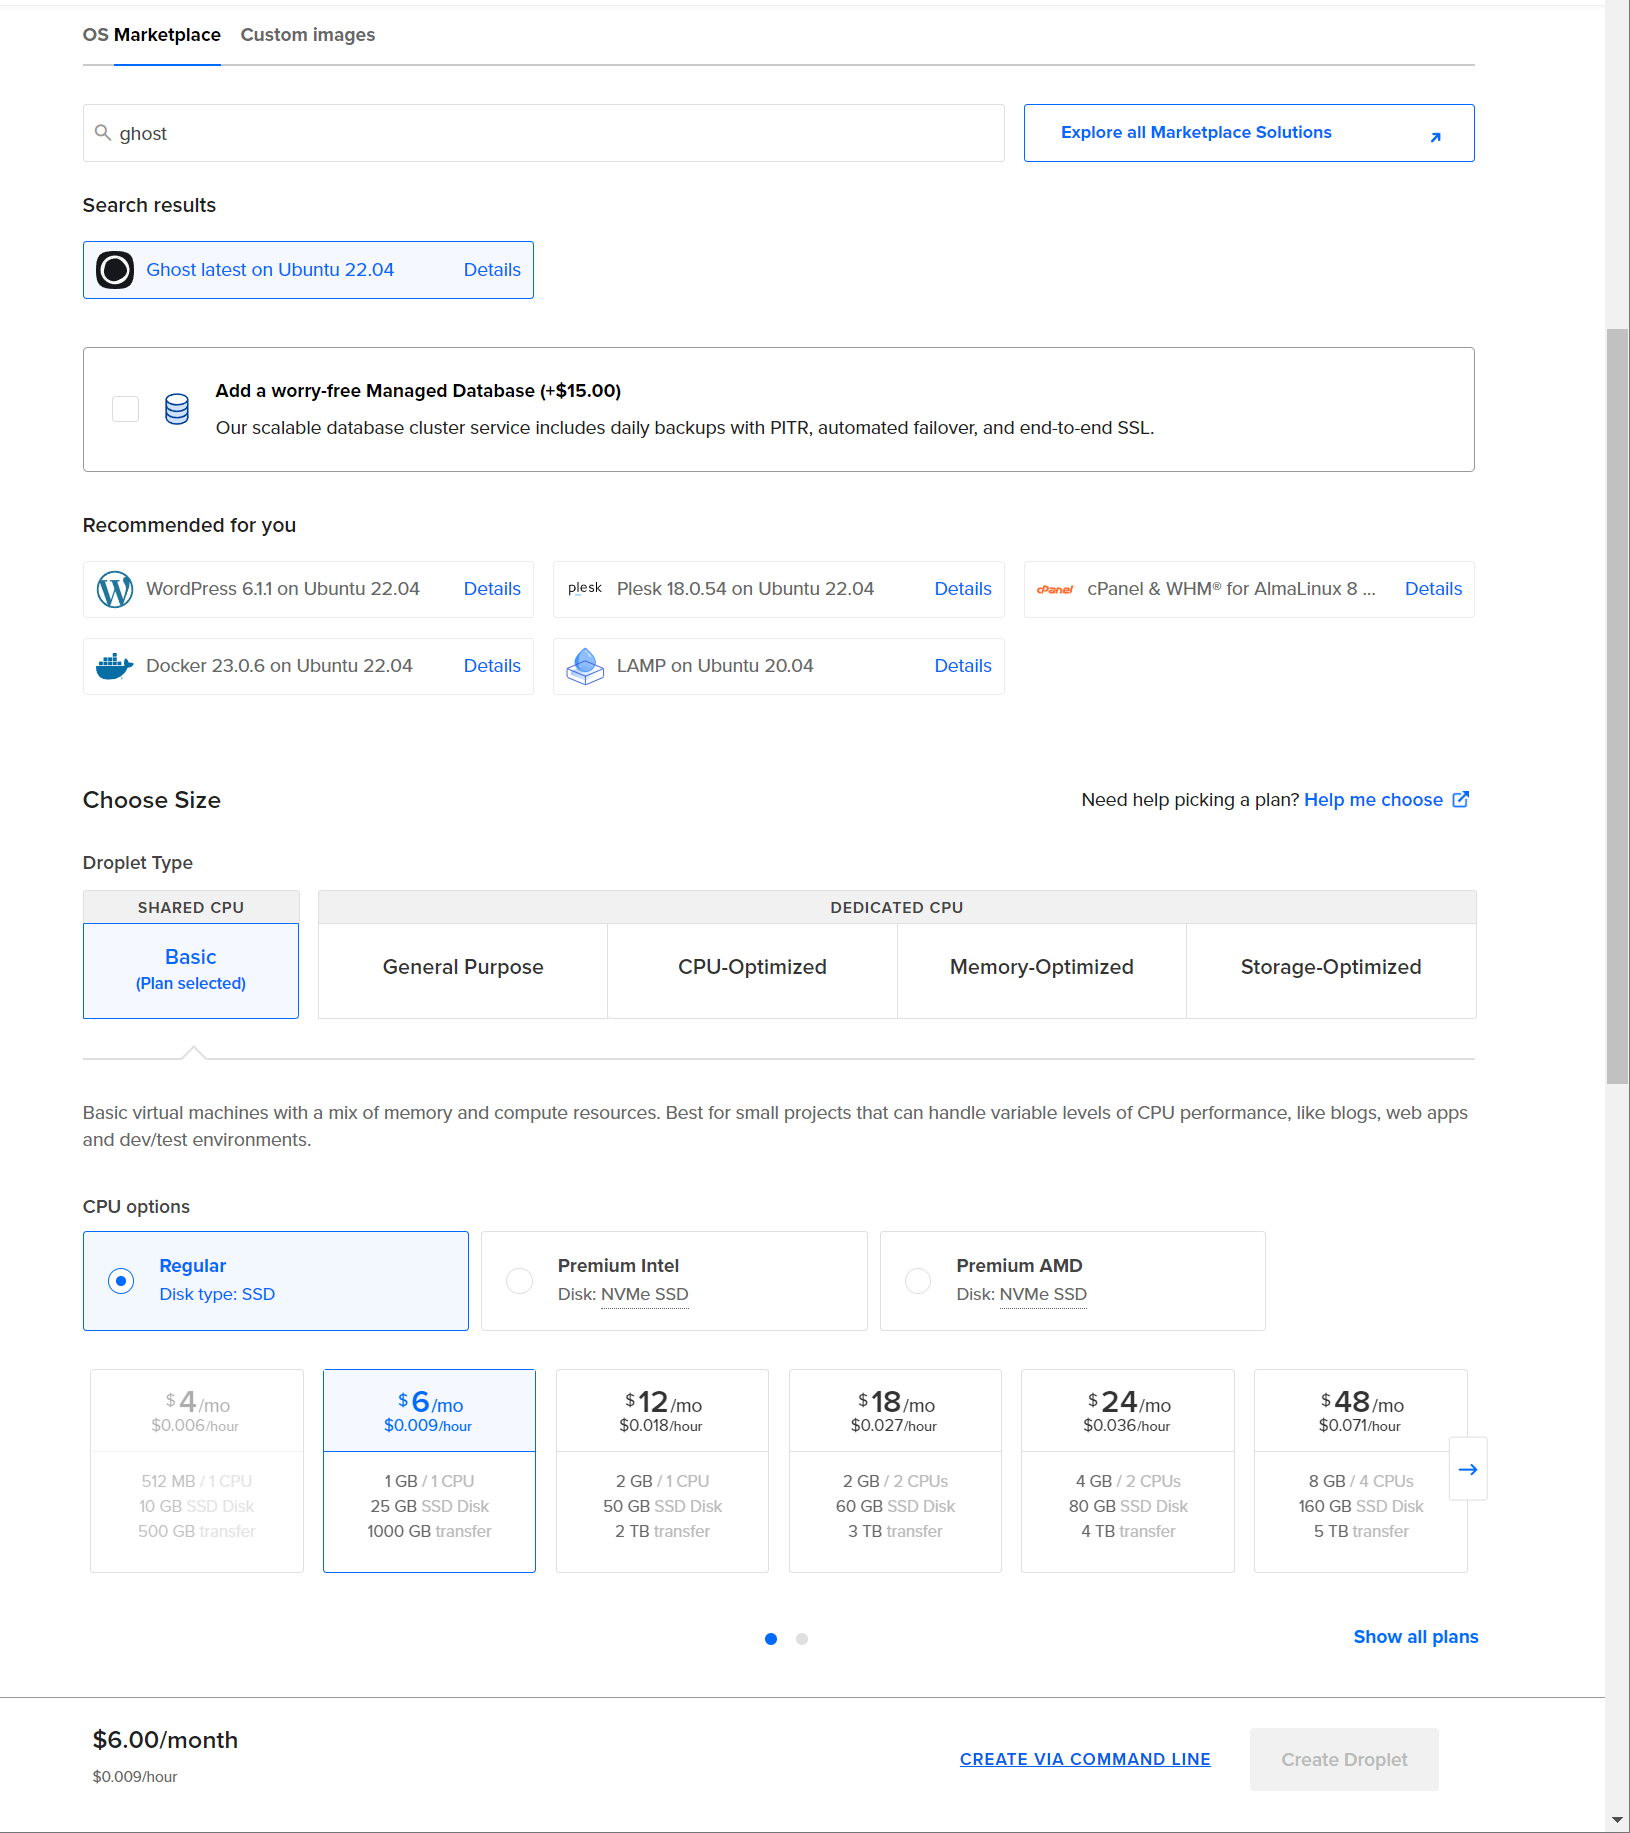
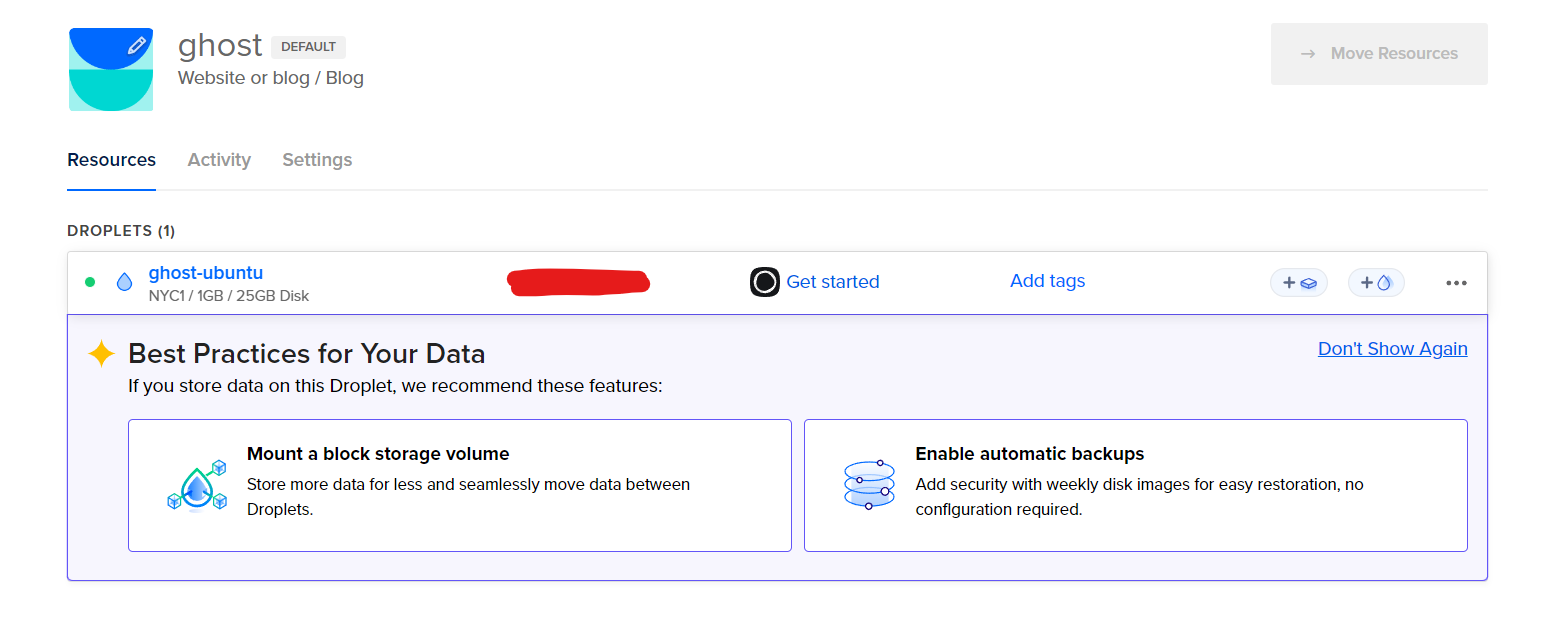
Chose your region, but instead of choosing an OS like usual we're going to go to the Marketplace and choose Ghost. This will install Ubuntu 22.04 and Ghost on your droplet. The DigitalOcean Marketplace is full of one-click apps and services that you can deploy really easily. I picked the $6/month machine. Here's what my deployment page looks like before I create the droplet.
Set a root password or SSH key, change the hostname at the bottom (if you want) and click "create droplet".
Now that it's done, let's access the shell of our droplet to make some changes. You can do this by ssh-ing into the IP provided on the dashboard, or you can click the ellipses on the right -> "access console", which gives you a web console.
Once you're all done with that, head over to the console of your droplet, and you'll eventually be shown this:
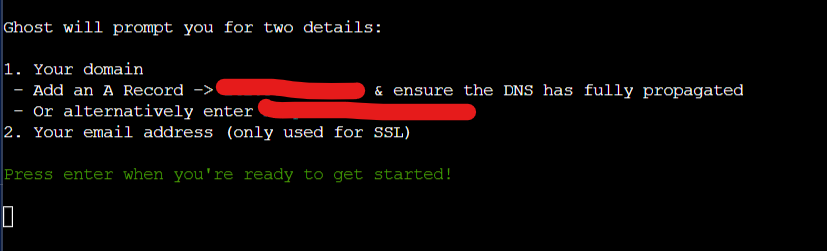
Whoops, we didn't set up our domain yet! We'll come back to Ghost in a minute.
Domain Name Set Up
Since this is going to be a blog, you'll need a domain name. You can do this through many different platforms like Name, Namecheap, etc. Go find a domain you want, or use one you already have.
The basics of what we'll be doing is simple, and applies to pretty much any site you'll ever host. You're going to need to:
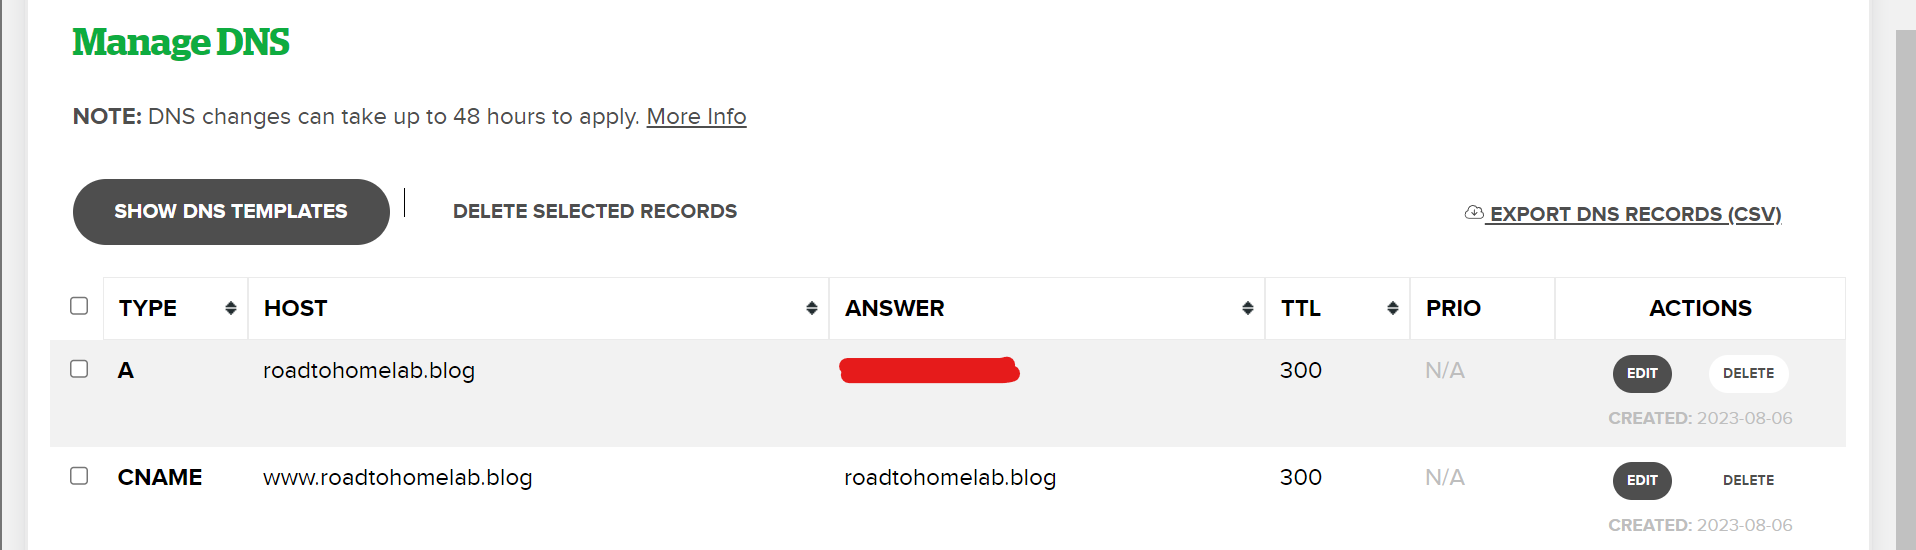
- make an A record which directs your domain name, verycoolblog.com, to the IP of the droplet you just created, hosting your very cool blog.
- make a CNAME record which re-directs traffic pointed at www.verycoolblog.com over to your actual domain name which is verycoolblog.com.
Here's are my DNS records for this blog, which you can match other than the IP of your droplet IP.
DNS takes some time to propagate, so if this doesn't work instantly don't stress it, we can continue the config by accessing Ghost directly via IP.
Back to the console.
Ghost Config
Now, go ahead and click Enter on the console to jump into the config. It'll download and install Ghost, so you'll need to wait a little bit.
You'll then be asked for your "blog URL", which will be the domain we set up earlier. The process will then set up SSL, and ask you for an email to associate with it. Finally, it'll start up Ghost.
If everything goes smoothly you should be able to go to http://domain/ghost in a web browser and get to a Ghost setup page.
If things did not go smoothly, that's okay too. Go to http://dropletIP/ghost to get around the domain thing for now, I've got some troubleshooting steps at the end of this post. We'll get you sorted.
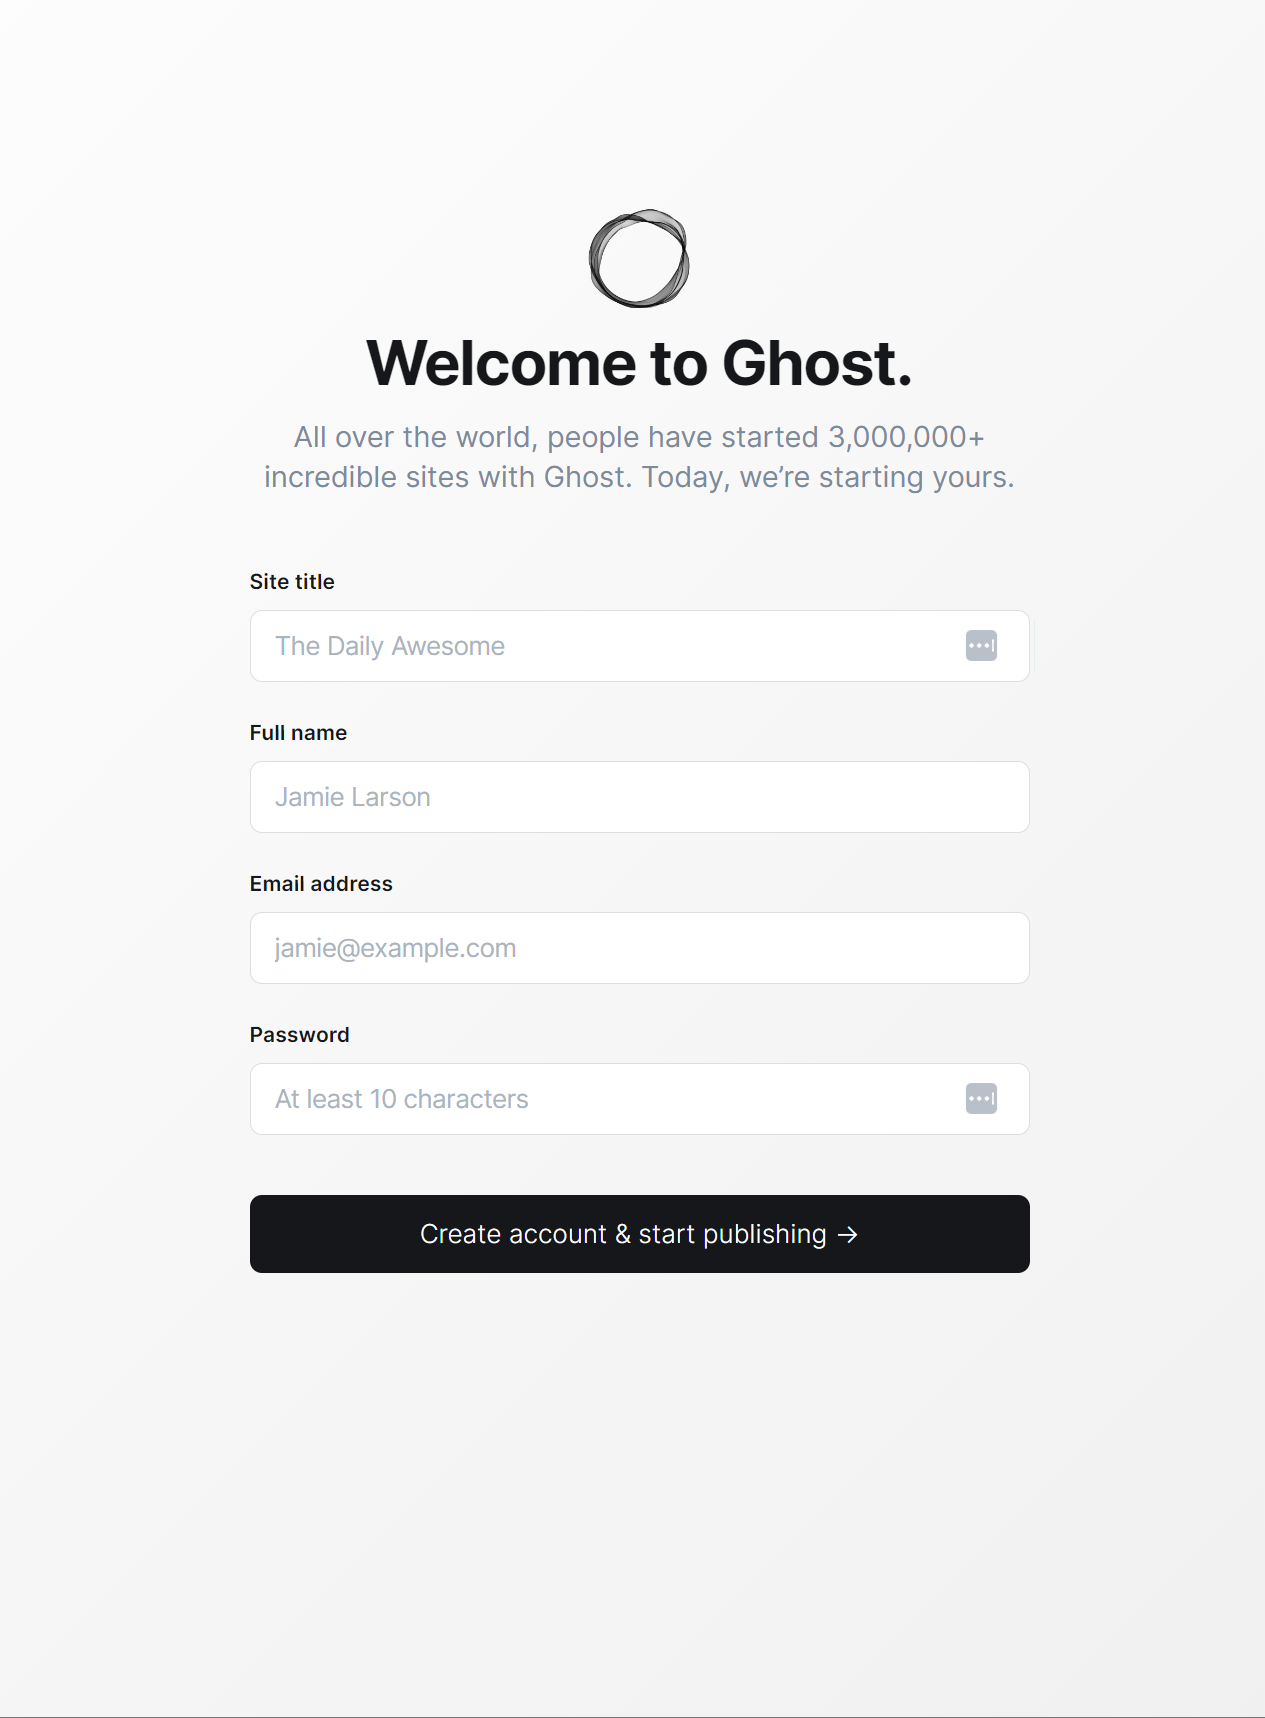
At this stage, you're ready to login and configure your Ghost instance. That wasn't too bad! Have fun playing around with your new blog.
Thanks for reading, if I missed anything please let me know!
Troubleshooting
I ran into an issue that I thought others might run into as well. When Ghost installs via the CLI one of two things can happen here, either:
- no errors on the CLI
- something broke and you see something like this:

In my case, this was because I had typed the Ghost URL incorrectly. I fixed this with these commands:
sudo -i -u ghost-mgrthis makes you the ghost mgr user
cd var/www/ghostchange directories to where ghost is installed
ghost config url http://domainreinitiate the ghost URL
Here's a solid blog that gives some troubleshooting steps for getting Ghost started.
 Dan Rowden