Local Rancher Behind Cloudflare Tunnel: NGINX LB + Docker Setup


When I’m helping customers troubleshoot Rancher issues I spin up and tear down local Rancher environments constantly.
Most of the time, everything runs locally with no need for public access (and if I need to access it remotely I do so with Tailscale). But some tests, like provisioning clusters in a cloud k8s offering (EKS, AKS, GKE) or using Rancher’s built-in EC2 cluster provisioning require my Rancher server to be publicly reachable.
What I didn’t want was a Rancher instance that’s permanently exposed to the internet or a requirement to open ports on my pfSense router every time I need to run a test. I wanted something I could turn on for a few hours, run my cloud-provisioning tests, and then shut back down as soon as I’m done.
That’s what led me to Cloudflare Tunnel (cloudflared). I already make use of NGINX Load Balancer in Docker for my Rancher environment load balancing, so I can securely expose my local Rancher environment to the internet on demand, no firewall changes, no static public IP, and no long-term exposure.
In this guide, I’ll walk through how I set it up and how you can do the same.
Prerequisites
The prerequisites here are:
- A Cloudflare domain name
- A local NGINX LB running in Docker
- A Rancher environment (3 nodes, in my case)
If you don't have these set up that's okay, I think it'll still be worth your time.
Architecture
Let's briefly discuss the architecture.
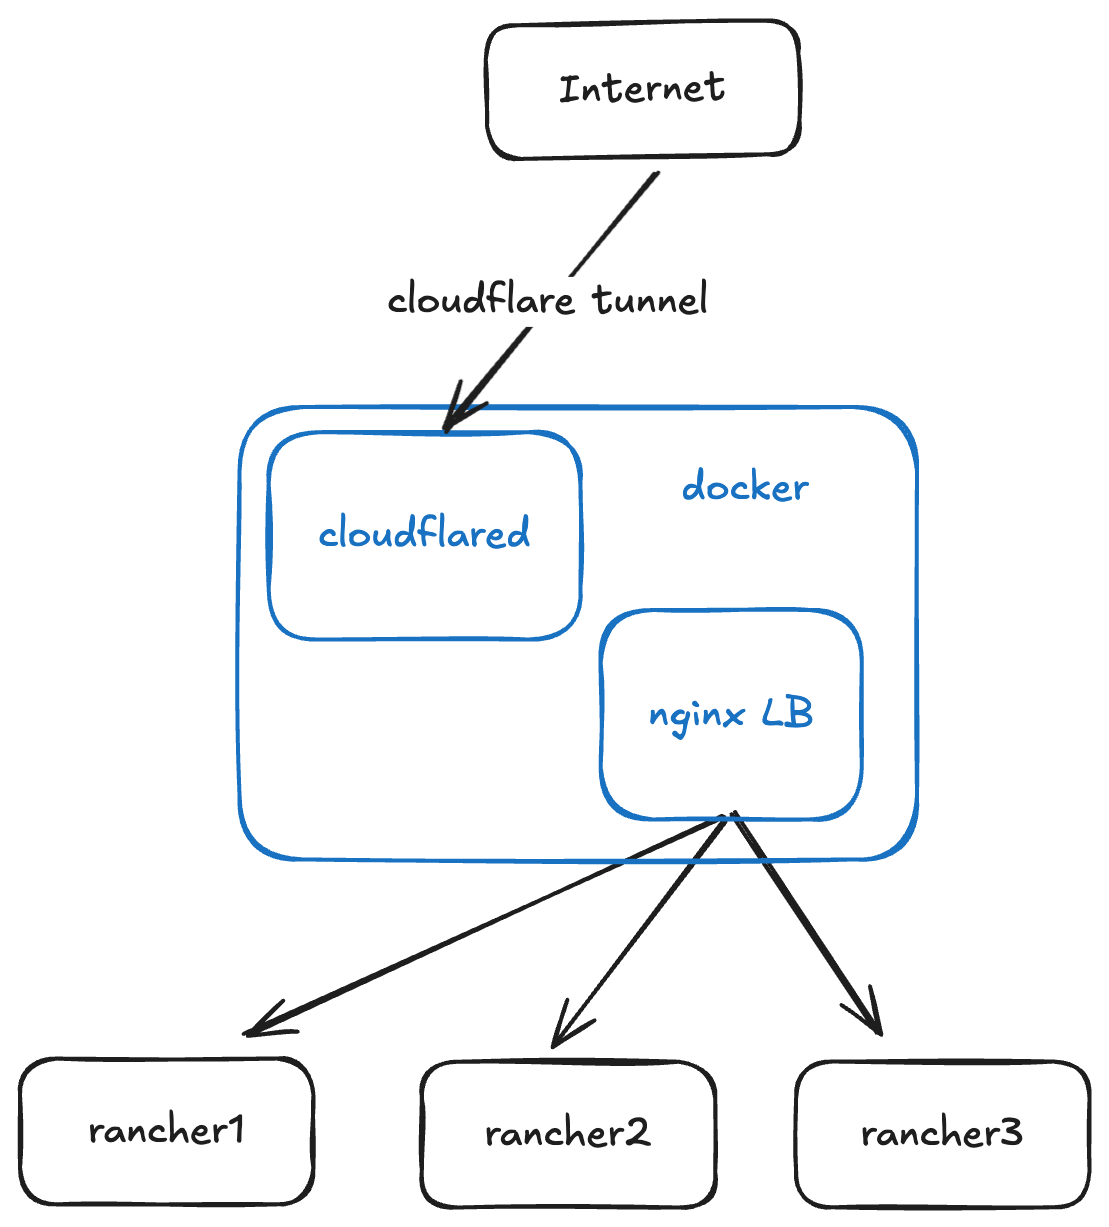
The Cloudflare tunnel is what we'll set up in the next section. It's job is to securely route traffic from the Cloudflare network (i.e. the internet) to wherever you determine.
Cloudflared is the client, which can be installed on macOS, Windows, Linux, or Docker. In our case, as you can see above, we'll be installing the client on the same Docker host providing our load balancing.
NGINX Load Balancer is what handles the traffic from my local network and balances those connections to my Rancher cluster.
Rancher is what I'm using for all my kubernetes management. It runs on an RKE2 cluster in my lab.
Make a Cloudflare Tunnel
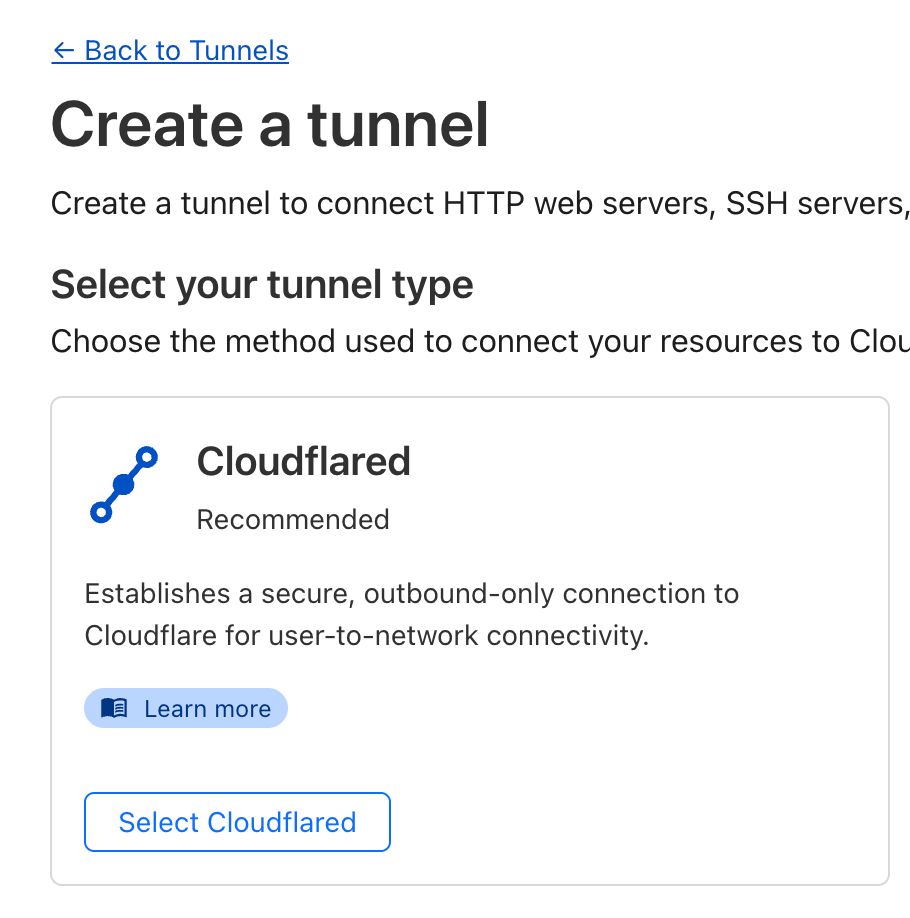
Assuming you already have a domain name through Cloudflare, setting up a tunnel is simple. Go to:
Zero Trust -> Networks -> Tunnels
Then click "Create a Tunnel". Chose "Cloudflared" as the type.
Give your tunnel a good name, and on the next page click "Docker".
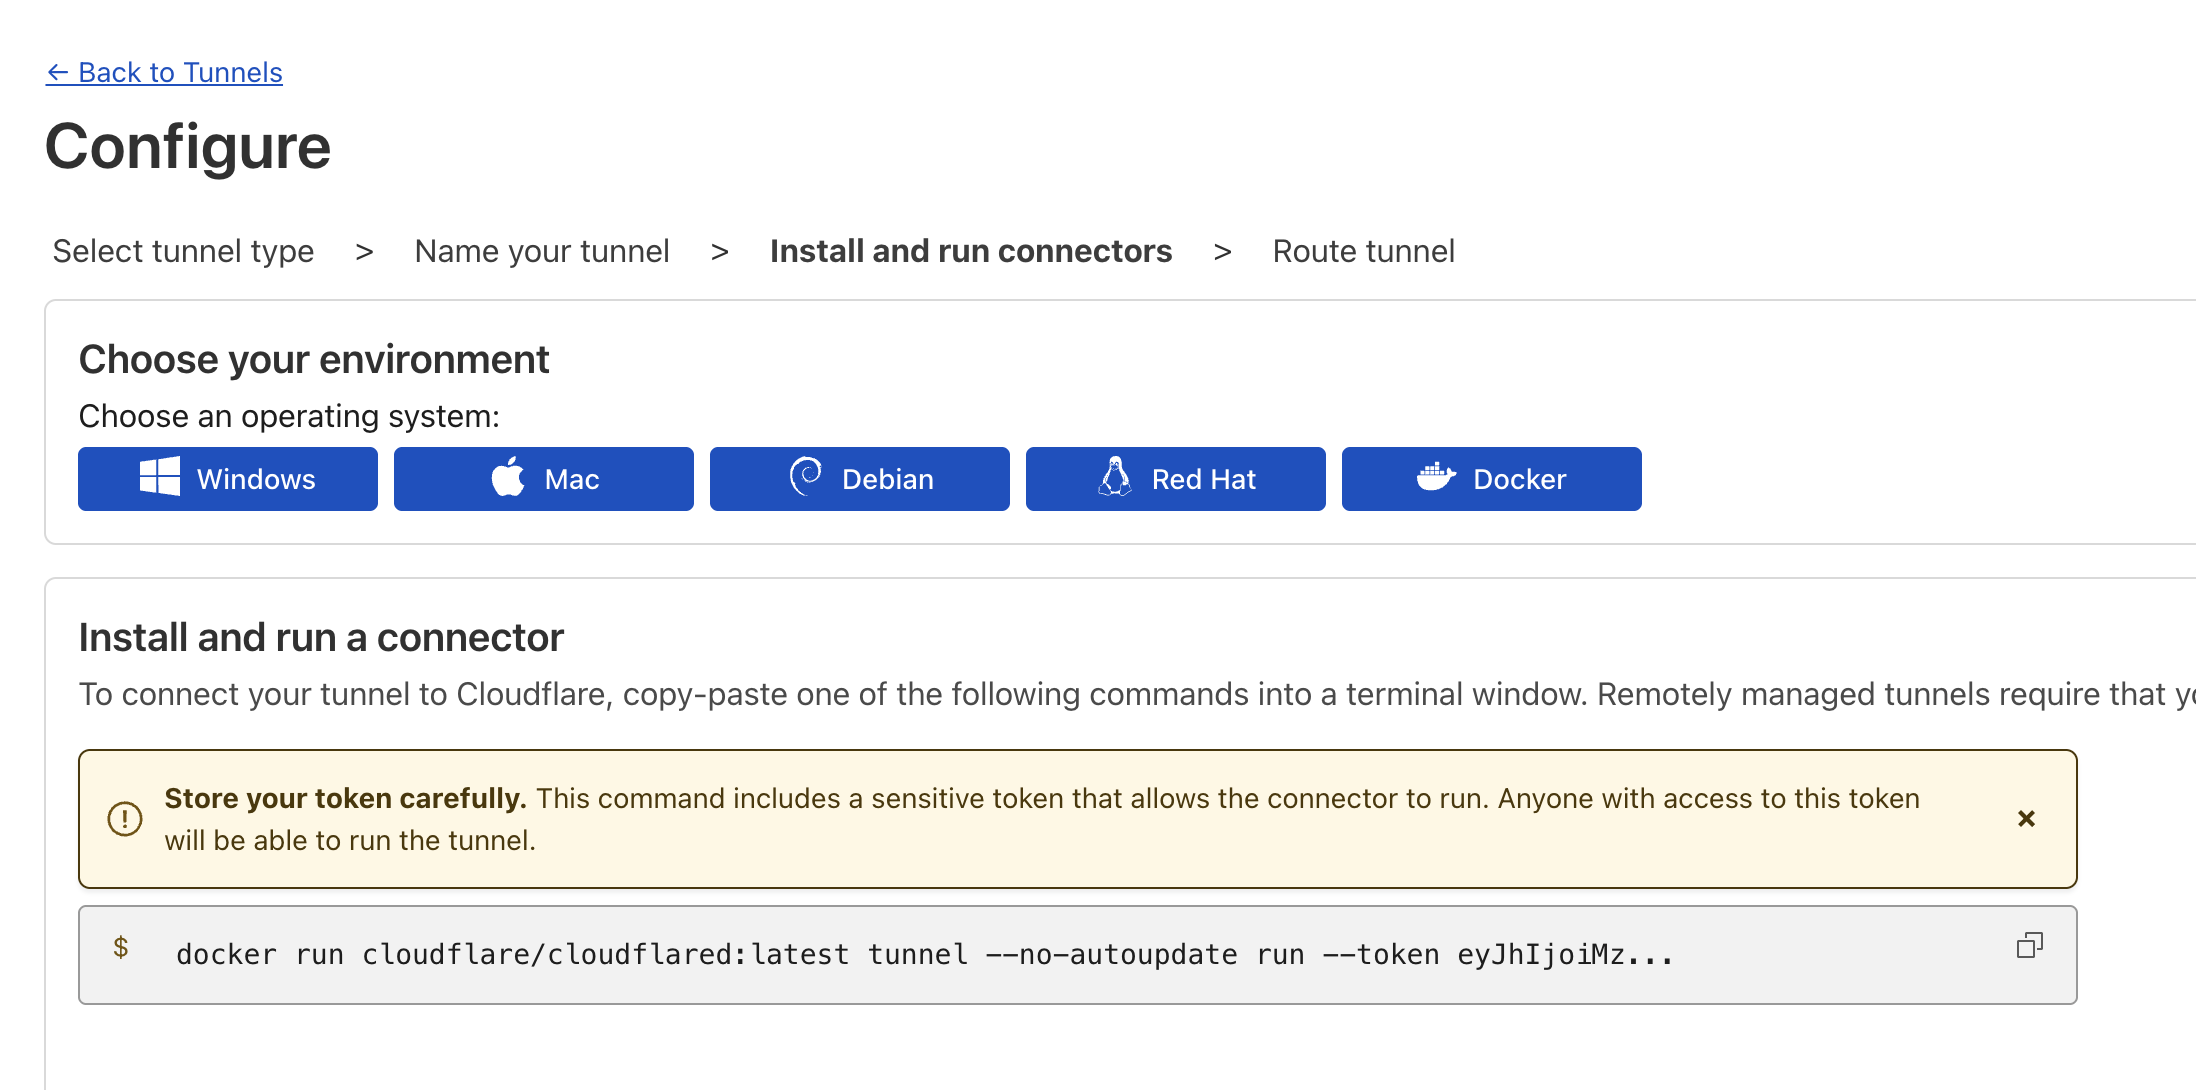
Cloudflare will generate a "docker run" command for you at the bottom of the page, copy that, we'll need to edit it before we run it.
Click "Next".
On the next page you'll configure the application that's going to be exposed with this tunnel. Copy the settings below while also adding in your own domain and subdomain.
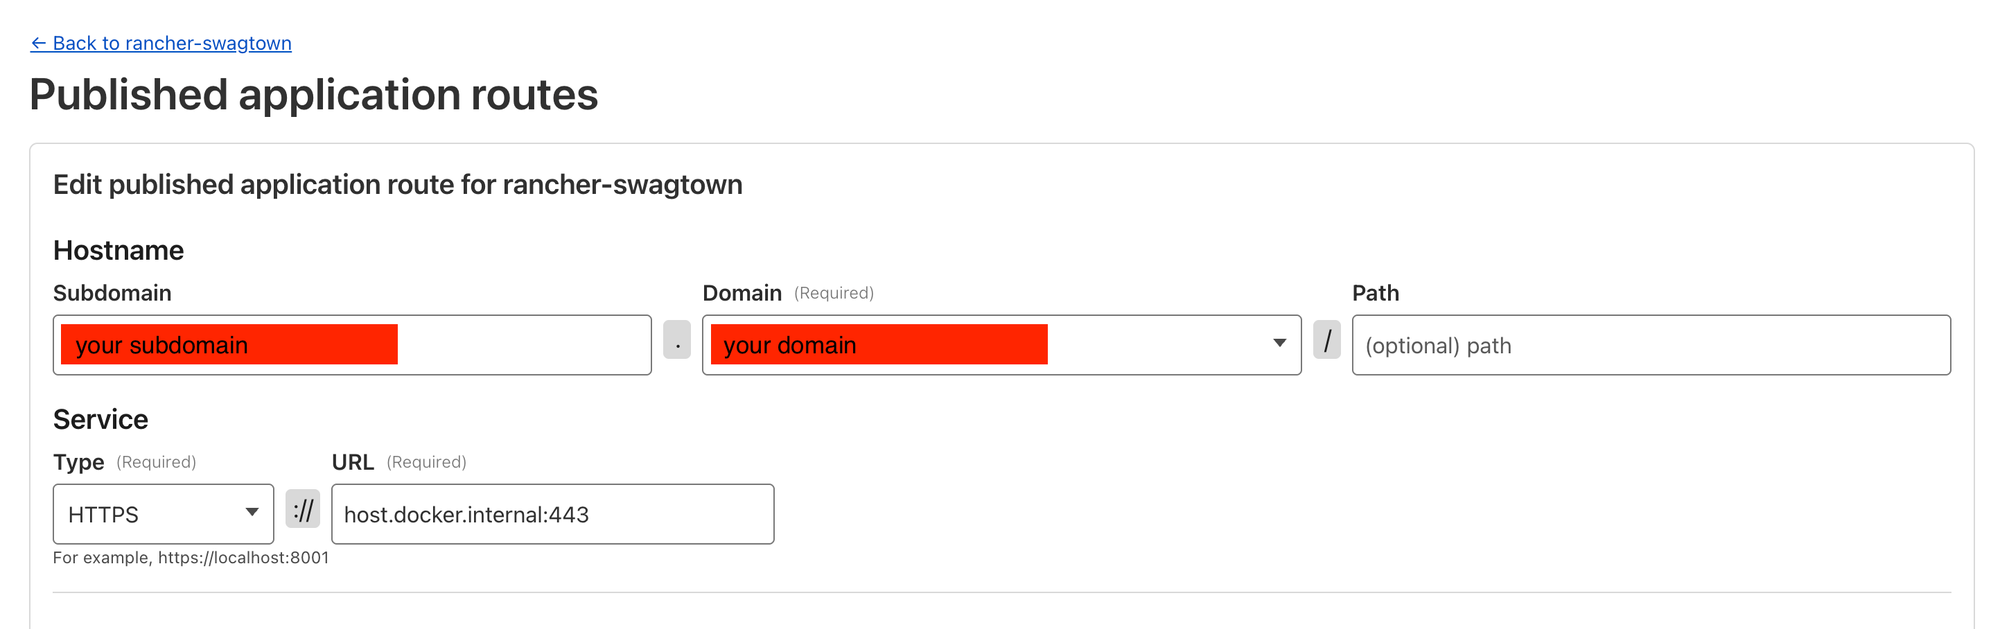
Note: this will create a CNAME record to point this subdomain to the tunnel.
Click "Complete Setup".
NGINX Load Balancer
Here's my LB config you can use. My certs are in ~/user/certs and I have my 3 Rancher node IPs listed in the "rancher_backend" section.
worker_processes 1;

events {
    worker_connections 1024;
}

http {
    server {
        listen 80;
        return 301 https://$host$request_uri;
    }

    upstream rancher_backend {
        least_conn;
        server <server_IP_1>:443;
        server <server_IP_2>:443;
        server <server_IP_3>:443;
    }

    server {
        listen 443 ssl;

        ssl_certificate /etc/nginx/certs/cert.pem;
        ssl_certificate_key /etc/nginx/certs/key.pem;

        location / {
            # Block WebSockets
            if ($http_upgrade ~* "websocket") {
                return 403;
            }

            proxy_pass https://rancher_backend;
            proxy_ssl_server_name on;
            proxy_set_header Host $host;
            proxy_set_header X-Forwarded-For $proxy_add_x_forwarded_for;
            proxy_set_header X-Forwarded-Proto $scheme;
        }
    }
}
Here's how I run NGINX passing in ~/user/certs for it to consume my certs and serve them up.
docker run -d --name rancher-lb \
    -p 80:80 -p 443:443 \
    -v /etc/nginx.conf:/etc/nginx/nginx.conf:ro \
    -v /home/user/certs:/etc/nginx/certs:ro \
    --restart unless-stopped \
    nginx
Run Cloudflared
Now, take the token from the generated Docker command and paste it in the below command that you'll run on your Docker host.
docker run -d \
  --name cloudflared \
  --add-host=host.docker.internal:host-gateway \
  cloudflare/cloudflared:latest tunnel \
  --no-autoupdate run \
  --token xxxxxxxxxxxxxxxxxxxxxxxxx
This simply:
- pulls/runs the cloudflared container
- passes in the token to authenticate with Cloudflare
- add the host.docker.internal DNS entry to the container so that it can reach the host machine
If you're following closely you'll notice that the Cloudflare tunnel points to port 443 on the host machine so that it'll function just like it would if you were on the local network hitting the IP address of the load balancer host.
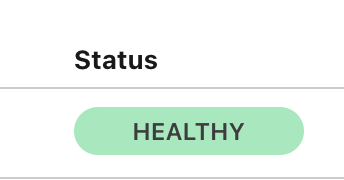
Once you run the command above^ if your tunnel is up, it should show as healthy in the Tunnels page on Cloudflare.
You should now have a publicly accessible Rancher URL, ready to be used with any cloud provider. Whenever you'd like to turn it off, just stop the cloudflared Docker container and your Rancher instance won't be publicly accessible.